There are some recipes that make dinner feel a little more homemade, and warm breadsticks are one of them. This sourdough breadsticks recipe makes soft, lightly chewy breadsticks with a golden outside and a mild sourdough flavor. They are finished with garlic butter and herbs, so the kitchen smells amazing before they even reach the table.
What I like most about this style of recipe is that the dough itself is simple. You are not trying to hide the flavor under a long ingredient list. Good fermentation, a soft dough, proper shaping, and a short bake do most of the work.
Serve these sourdough bread sticks with soup, pasta, salad, or simply warm with butter for dipping.
Why You’ll Want to Make These Sourdough Breadsticks
Homemade breadsticks can sound like a weekend project, but this dough is much less demanding than it looks.
The main thing to plan for is fermentation time.
Once the dough is mixed, you are mostly waiting for the sourdough starter to do its job. That makes this a nice recipe to start earlier in the day and bake later when dinner is getting close.
You can also make the dough ahead and use a slower refrigerator fermentation when that fits your schedule better.
The finished breadsticks are:
- Soft in the middle
- Lightly golden around the edges
- Mildly tangy from sourdough
- Buttery and garlicky
- Easy to serve with dinner
- Freezer-friendly
Sourdough Breadstick Recipe at a Glance
| Detail | Amount |
|---|---|
| Yield | 12 breadsticks |
| Prep time | About 25 minutes |
| First rise | About 4–7 hours |
| Final rise | About 1–2 hours |
| Bake time | 15–20 minutes |
| Oven | 400°F / 200°C |
Fermentation time can vary quite a bit. A warm kitchen may move the dough along quickly, while a cooler room can make the same dough take longer.
That is why the dough itself matters more than the clock.
Ingredients for Sourdough Breadsticks
For the dough
- 110 g active sourdough starter
- 240 g water, lukewarm
- 360 g bread flour or all-purpose flour
- 40 g melted unsalted butter
- 15 g honey
- 8 g fine salt
For the garlic butter topping
- 45 g melted butter
- 1 small garlic clove, finely grated
- 1 teaspoon dried Italian herbs
- Small pinch of salt
- 1 tablespoon finely chopped parsley, optional
- 1–2 tablespoons finely grated Parmesan, optional
Bread flour will give you a little more chew, while all-purpose flour makes perfectly good breadsticks too.
Use whichever one you already keep in the kitchen.
The Starter Matters More Than the Flour Brand
For this recipe, the starter should be active before you begin mixing.
Look for a starter that has risen noticeably after feeding and has plenty of visible bubbles. It should look lively rather than flat and tired.
A starter does not have to hit an exact “double in four hours” rule to work. Different starters behave differently.
What matters is that yours is active and capable of raising dough.
If the starter has been stored in the refrigerator, feed it and let it become active before starting the recipe.
How to Make Sourdough Breadsticks
1. Mix the starter, water, honey and butter
Add the active sourdough starter to a large bowl.
Pour in the lukewarm water and stir until the starter loosens into the water.
Add the honey and melted butter.
Give everything a quick mix.
It does not need to be perfectly smooth at this point.
2. Add flour and salt
Add the flour and salt.
Mix with a wooden spoon or your hand until no large dry patches remain.
The dough should look rough and slightly sticky.
That is exactly what you want.
Do not immediately start adding more flour because the dough feels tacky. A softer dough generally gives you a nicer breadstick than one that has been stiffened with too much extra flour.
Cover the bowl and let it rest for about 20–30 minutes.
3. Strengthen the dough
After the short rest, knead the dough by hand for about 5–8 minutes.
You can also use a stand mixer with a dough hook on low to medium speed.
The dough should gradually become smoother and more elastic.
A useful test is to gently stretch a small piece.
It should stretch without instantly tearing into pieces.
You do not need to chase a perfect windowpane every time. The more practical goal is a dough that feels stronger, smoother, and easier to handle than when you first mixed it.
4. Let the dough ferment
Place the dough in a lightly greased bowl.
Cover it and leave it at room temperature until it has become visibly puffier.
For many kitchens, this may take around 4–7 hours.
Do not worry if it does not double exactly.
For breadsticks, I would rather see the dough become noticeably lighter and aerated than force it to reach a specific volume.
Signs the dough is ready
Look for:
- A clear increase in volume
- A softer, more inflated appearance
- Small bubbles around the dough
- A slightly jiggly feel when the bowl is moved
- Dough that feels airy rather than dense
If the room is cold, give it more time.
If your kitchen is warm and the dough has already become very puffy, move on sooner.
5. Turn the dough out and divide it
Lightly flour your work surface.
Transfer the dough onto it and gently press it into a rough rectangle.
Divide the dough into 12 pieces.
For more even breadsticks, use a kitchen scale and divide the dough into roughly equal portions.
This is a small step, but it makes the finished tray look much more consistent and helps everything bake at a similar rate.
6. Shape the breadsticks
Take one piece of dough and roll it gently between your hands and the counter.
Aim for a rope around 8–10 inches long.
Try to keep the center and ends reasonably similar in thickness.
Do not stretch the dough aggressively.
If it keeps shrinking back while you roll it, stop and leave it alone for five minutes.
The gluten will relax and the dough will usually become much easier to shape.
Place each piece on a parchment-lined baking sheet.
Leave a little room between them because they will puff during the final rise.
7. Let the shaped breadsticks rise
Cover the tray loosely with a clean towel or plastic wrap.
Leave the shaped dough for about 1–2 hours.
Again, use the dough as your guide.
You are looking for breadsticks that look slightly fuller and feel soft and relaxed.
They do not need to double.
In fact, waiting for a dramatic rise can push them too far.
The Garlic Butter Makes These Special
While the breadsticks are finishing their final rise, make the topping.
Mix the melted butter, grated garlic, Italian herbs, and a small pinch of salt.
Keep the mixture ready beside the oven.
I recommend grating fresh garlic very finely. It spreads more evenly than larger pieces and gives every breadstick a little garlic flavor.
For a cheesier finish, keep some Parmesan nearby for the final brush.
Bake the Sourdough Breadsticks
Preheat your oven to 400°F (200°C).
Brush the shaped breadsticks lightly with some of the garlic butter mixture.
Bake for about 15–20 minutes.
The exact time depends on how thick you rolled them and how your oven runs.
Start checking around the 15-minute mark.
You are looking for:
- A light golden top
- Slightly browned edges
- A baked, firm exterior
- A center that still feels soft
Do not wait for them to become deeply brown all over.
That is an easy way to end up with dry breadsticks.
As soon as they come out of the oven, brush them again with the remaining garlic butter.
Add parsley or Parmesan while they are still warm.
Then let them sit for a few minutes before serving.
Sourdough Garlic Breadsticks
The basic recipe already gives you a buttery finish, but turning it into sourdough garlic breadsticks takes almost no additional work.
For stronger garlic flavor, use an extra small clove.
For a gentler flavor, stick with one.
You can also change the herbs depending on what you have.
Try:
- Oregano
- Basil
- Rosemary
- Parsley
- Italian seasoning
- A little red pepper flake for heat
For a richer restaurant-style finish, add Parmesan immediately after the butter.
The cheese will cling to the warm surface and soften slightly.
How Thick Should Sourdough Bread Sticks Be?
This comes down to the texture you prefer.
Thinner breadsticks
These bake faster and develop more crispness around the outside.
Medium-thickness breadsticks
These are my favorite all-purpose shape because you get a golden exterior without losing the soft center.
Thick breadsticks
These stay softer and chewier, but they need more time in the oven.
The most important thing is consistency.
If one breadstick is twice as thick as another, they will not bake at the same rate.
What to Serve With Sourdough Breadsticks
These are especially useful when dinner has plenty of sauce or broth.
Try them with tomato soup, creamy soup, pasta, roasted vegetables, or a simple salad.
They would also be a natural side for our Spicy Italian Tortellini Soup. The garlic-herb breadsticks are perfect for dipping into the broth and make a simple soup dinner feel more substantial.
For more homemade meal ideas, our Homemade Recipes Heartumental collection is another useful place to browse when you are planning what to cook next.
Can You Make the Dough Ahead?
Yes.
The easiest method is to let the dough complete its first fermentation, then cover it and place it in the refrigerator.
The cold temperature slows fermentation, which gives you more flexibility with your schedule.
When you are ready to continue, let the dough warm enough to become easy to shape, then divide and roll the breadsticks.
Because sourdough activity varies, do not assume refrigerated dough always needs exactly the same amount of time to finish.
Let the dough tell you when it is ready.
What if You Want to Bake Them the Next Day?
You can mix the dough later in the day and use the refrigerator to extend the fermentation.
Another option is to shape the breadsticks and refrigerate the covered tray.
The next day, take the tray out and allow the dough to lose its chill and become slightly puffy before baking.
This is especially convenient when you are making breadsticks for a dinner or gathering.
Can You Make Sourdough Breadsticks With Discard?
Not with exactly the same rise.
Active starter contains the fermentation strength that helps this dough puff up.
Discard can add sourdough flavor, but old inactive discard should not be expected to raise the dough by itself.
You can build a different discard-based breadstick recipe with another leavening method, but that would be a separate formula.
For this recipe, use an active starter.
Why Are My Sourdough Breadsticks Dense?
Usually, the first thing to check is fermentation.
If the dough looked almost the same several hours after mixing, the starter may not have been active enough or the room may have been too cool.
Do not rush the first rise.
The dough should look noticeably more alive before you shape it.
Another possibility is adding too much extra flour during kneading or shaping.
A stiff dough does not usually turn into wonderfully soft breadsticks just because it is sourdough.
Why Did My Breadsticks Turn Out Dry?
There are a few likely reasons.
They may have been rolled too thin.
They may have baked too long.
Or too much flour may have been added to the dough.
Start checking the breadsticks around the earlier end of the baking window, especially if you prefer a soft center.
Remember that the outside will continue to firm slightly as the breadsticks cool.
Why Did My Dough Keep Pulling Back?
That is usually a sign that the gluten needs a little time to relax.
Do not fight the dough.
Cover it and leave it for five to ten minutes.
Then roll again.
This is much easier than trying to force a tight piece of dough into a long rope.
Why Are Some Breadsticks Bigger Than Others?
Uneven portions are usually the reason.
You can estimate the pieces by eye, but a kitchen scale makes the job easier.
Equal portions also help the breadsticks finish baking at roughly the same time.
That is particularly helpful when making a large batch.
How to Get Better Flavor From the Same Dough
You do not need to change the whole recipe to make it taste different.
Try one of these small adjustments:
More savory: Add Parmesan and black pepper to the topping.
More herb-forward: Increase the dried Italian herbs or finish with fresh parsley.
More garlic: Add another small clove to the butter.
A little heat: Add a pinch of red pepper flakes.
More buttery: Brush the warm breadsticks a second time just before serving.
Small changes like these let you use the same dough for several different dinners.
Storage and Freezing
These breadsticks are at their best while still warm.
For short-term storage, let them cool completely and keep them in an airtight container at room temperature.
To warm them again, place them in a moderate oven for a few minutes.
You can also freeze the baked breadsticks.
Let them cool completely, place them in a freezer-safe bag or container, and freeze.
Reheat them in the oven rather than relying only on the microwave if you want the exterior to regain some texture.
A Few Things I Would Not Skip
Some steps in a recipe are flexible.
These are not the ones I would casually skip:
Use an active starter
A sluggish starter can turn an easy recipe into a very long wait.
Do not over-flour the dough
A little stickiness is much easier to deal with than a dry dough.
Watch fermentation, not just time
Sourdough does not run on a perfect clock.
Let the shaped dough relax
If it fights you, give it a short rest.
Do not overbake
Golden is good.
Deeply browned and dry is not what you are after here.
Easy Sourdough Breadstick Serving Ideas
Once you have the basic recipe, you can change the meal around it.
For a weeknight dinner:
Soup + sourdough breadsticks
For pasta night:
Spaghetti + salad + garlic breadsticks
For a lighter meal:
Roasted vegetables + salad + breadsticks
For a family dinner:
Chicken + potatoes + green beans + breadsticks
The breadsticks can stay the same while the rest of the meal changes.
That is part of what makes a reliable homemade recipe worth keeping.
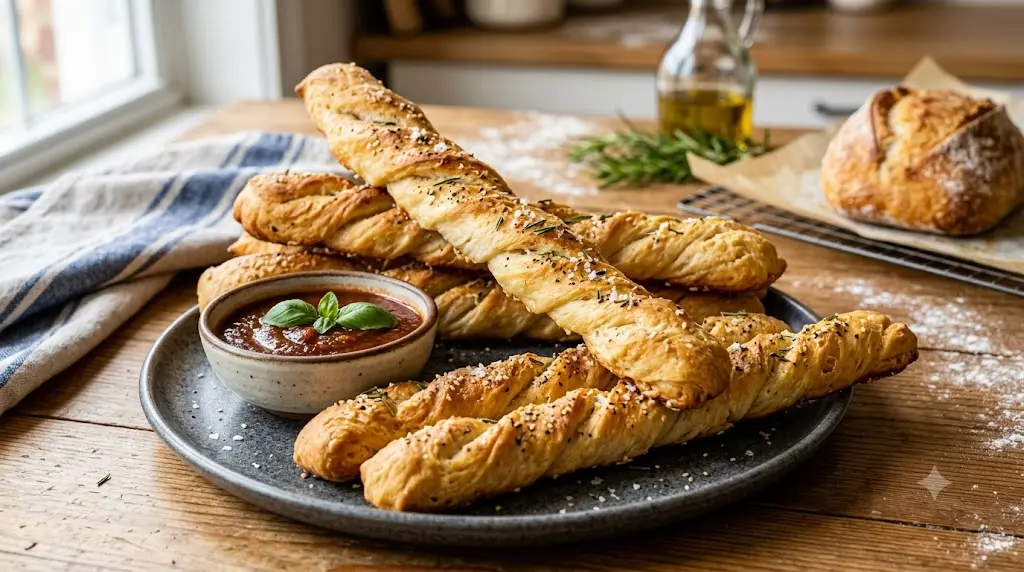
Sourdough Breadsticks Recipe
Ingredients
Equipment
Method
- Mix the wet ingredients: Add the active sourdough starter, lukewarm water, honey, and melted butter to a large bowl. Stir until combined.
- Add flour and salt: Mix in the flour and salt until a rough, slightly sticky dough forms. Cover and let it rest for 20–30 minutes.
- Knead the dough: Knead by hand for 5–8 minutes, or use a stand mixer until the dough becomes smoother and more elastic. Avoid adding too much extra flour.
- First rise: Place the dough in a lightly greased bowl, cover, and let it ferment at room temperature until noticeably puffy and lighter. This usually takes about 4–7 hours, depending on starter strength and room temperature.
- Divide the dough: Transfer the dough to a lightly floured surface and divide it into 12 similar-sized pieces.
- Shape the breadsticks: Roll each piece gently into an 8–10-inch rope. If the dough keeps shrinking back, let it rest for 5–10 minutes before rolling again.
- Final rise: Place the shaped breadsticks on a parchment-lined baking sheet. Cover loosely and let them rise for about 1–2 hours, until slightly fuller and relaxed.
- Make garlic butter: Mix the melted butter, grated garlic, Italian herbs, and salt in a small bowl.
- Bake: Preheat the oven to 400°F (200°C). Brush the breadsticks lightly with garlic butter and bake for 15–20 minutes, or until lightly golden and baked through.
- Finish: Brush the hot breadsticks with the remaining garlic butter. Add parsley and Parmesan if using. Serve warm.
Notes
- Use an active, bubbly sourdough starter for the best rise.
- Do not add excessive flour if the dough feels slightly sticky.
- Fermentation time will change with room temperature and starter activity.
- For softer breadsticks, avoid overbaking and brush with butter immediately after baking.
- For crispier sourdough bread sticks, roll the dough thinner and bake until the edges are more golden.
- For stronger garlic flavor, add another small garlic clove to the topping.
- Bread flour gives a slightly chewier texture, while all-purpose flour works well for softer breadsticks.
Sourdough Breadsticks Recipe FAQ
How long does it take to make sourdough breadsticks?
The hands-on work is fairly short, but fermentation takes longer. Expect roughly 6–10 hours from mixing to baking depending on starter strength and room temperature.
Can I use all-purpose flour?
Yes. Bread flour gives a slightly chewier texture, but all-purpose flour works well.
Can I use olive oil instead of butter?
Yes. Olive oil can be used in the dough or in the garlic topping if you prefer its flavor.
Can I make plain sourdough bread sticks?
Absolutely. Leave off the garlic butter and finish them with a little melted butter, olive oil, or flaky salt.
Can I make them into garlic knots?
Yes. After dividing the dough, tie each piece into a loose knot instead of rolling it into a straight breadstick. Keep an eye on the baking time because the shape is thicker.
Should sourdough breadsticks double during proofing?
Not necessarily. Look for a noticeable increase in volume and a lighter, puffier dough rather than waiting for an exact doubling.
How do I know the center is cooked?
The breadsticks should feel baked and lightly firm outside while remaining soft inside. If you are unsure, break one open and check the center instead of relying only on the crust color.
Final Thoughts
A good sourdough breadstick recipe does not need to be complicated.
The dough is built from a few everyday ingredients, but the little details matter. Start with an active starter, keep the dough soft, give fermentation enough time, shape the pieces evenly, and take them out before they turn too dark.
Then comes the easy part.
Brush on garlic butter.
Add herbs.
Maybe a little Parmesan.
Serve them while they are still warm.
These sourdough breadsticks are especially good beside soup or pasta, but they are also the kind of homemade side you can keep in your recipe rotation because the dough is flexible and the flavor is easy to change.
And once you get comfortable with the basic dough, you can make thinner, softer, crispier, cheesier, or extra-garlicky sourdough bread sticks without starting from a completely different recipe.
That is the kind of recipe worth having around: simple enough for an ordinary dinner, but good enough that everyone notices when you make it.
1 thought on “Sourdough Breadsticks Recipe: Soft, Chewy & Garlic-Buttery”