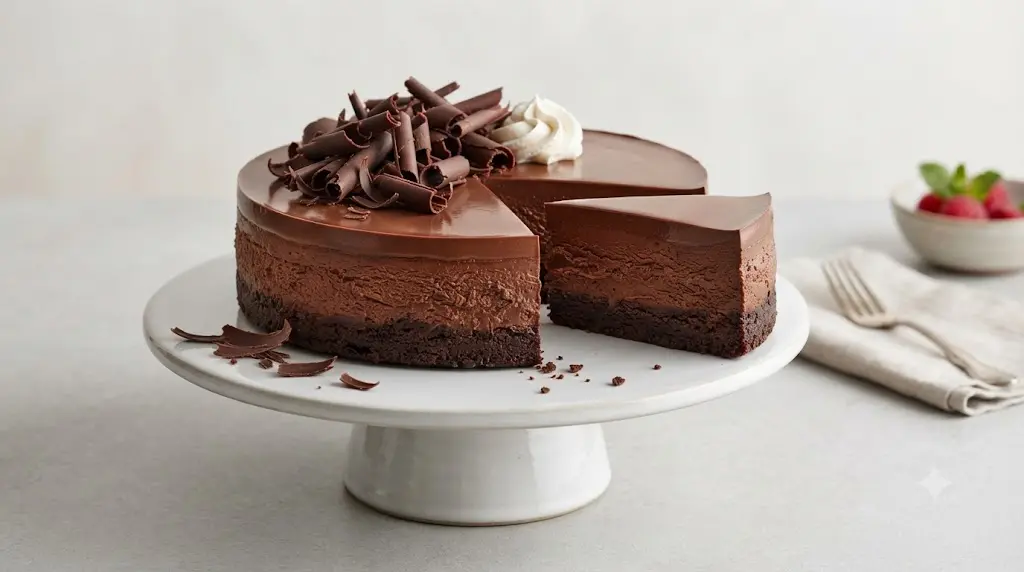
If you love deeply chocolatey desserts, this godiva chocolate cheesecake recipe is the kind of dessert that makes a regular cheesecake feel a little ordinary. It has a fudgy chocolate base, an intensely creamy chocolate cheesecake center, and a soft chocolate mousse topping that gives every slice a bakery-style finish.
This homemade version is inspired by the famous chocolate dessert associated with The Cheesecake Factory, but it is not an official Cheesecake Factory or Godiva recipe. The goal is to recreate the layered chocolate experience at home using practical ingredients and a method that works well in a standard kitchen.
The most important part is patience. The cheesecake needs to cool slowly and chill thoroughly before you add the mousse and slice it. Once properly chilled, the layers become much easier to cut cleanly.
Why You’ll Love This Godiva Cheesecake
This godiva cheesecake recipe is especially good when you want a dessert that feels impressive without relying on complicated decorating.
- Three chocolate layers: Fudgy base, creamy cheesecake, and airy mousse.
- Rich chocolate flavor: Dark chocolate and cocoa give the cheesecake depth instead of just sweetness.
- Smooth texture: Room-temperature ingredients help create a more even filling.
- Make-ahead friendly: The cheesecake needs several hours to chill, making it convenient for parties.
- Restaurant-style presentation: A little whipped cream and chocolate shaving can make each slice look elegant.
What Makes This Godiva Chocolate Cheesecake Different?
A traditional cheesecake can be mostly about tangy cream cheese, but this dessert puts chocolate at the center of every layer.
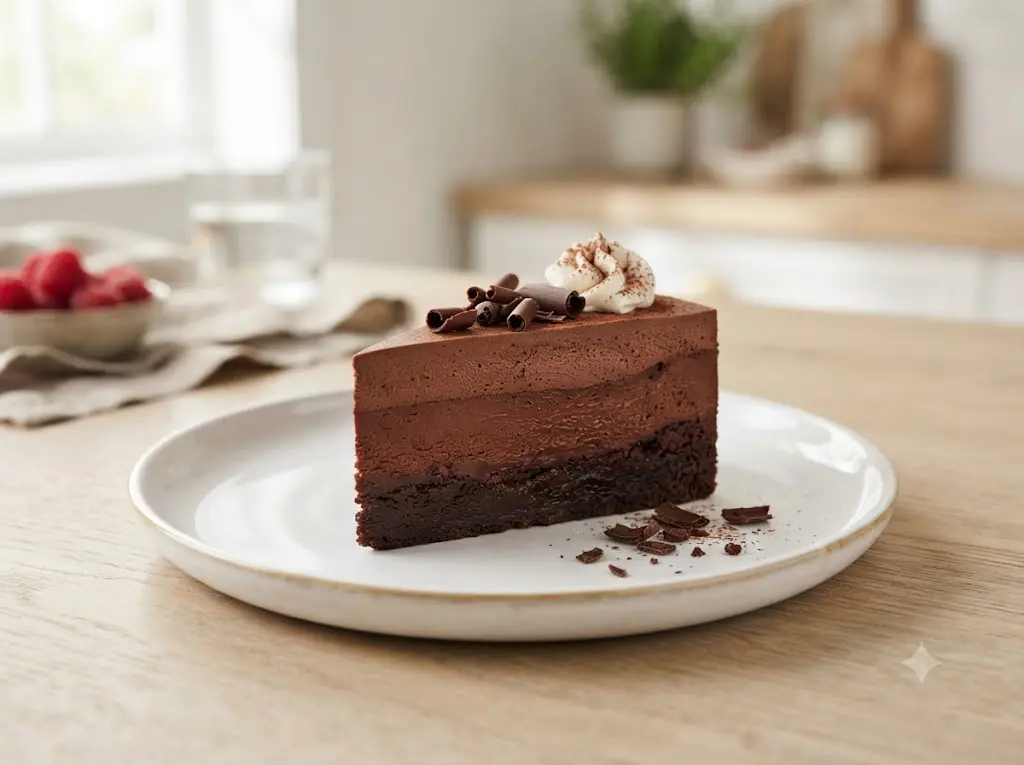
The base gives you a dense, brownie-like bite. The middle is softer and creamy, with melted chocolate adding a fuller cocoa flavor. The mousse provides contrast because it is lighter than the baked cheesecake.
The official Cheesecake Factory Bakery description of its GODIVA® Double Chocolate Cheesecake also highlights chocolate cheesecake, chocolate pieces, mousse, ganache, and chocolate whipped cream.
This homemade recipe takes inspiration from that chocolate-forward style rather than claiming to duplicate the commercial formula exactly.
Ingredients You’ll Need
For the Chocolate Brownie Base
- 4 ounces dark chocolate, chopped
- ½ cup unsalted butter
- ¾ cup granulated sugar
- 3 large eggs
- ½ cup unsweetened cocoa powder
- 1 teaspoon vanilla extract
- Small pinch of salt
For the Chocolate Cheesecake Layer
- 12 ounces dark chocolate, chopped
- 24 ounces full-fat cream cheese, softened
- 1 cup granulated sugar
- 5 large eggs, at room temperature
- 1 teaspoon vanilla extract
- ¼ cup unsweetened cocoa powder
- ½ cup sour cream
- ¼ teaspoon salt
For the Chocolate Mousse
- 4 ounces dark chocolate, chopped
- 1 tablespoon unsalted butter
- 3 large eggs, separated
- ¼ teaspoon cream of tartar
- ¼ cup granulated sugar
- ⅓ cup heavy cream
- 1 teaspoon vanilla extract
For Finishing
- Whipped cream
- Chocolate curls or finely grated chocolate
- Optional chocolate sauce
Ingredient Notes and Easy Substitutions
Dark chocolate: Choose a chocolate you genuinely enjoy eating because its flavor carries through the cheesecake. A chocolate around 60–70% cocoa works well for a balanced result.
Cream cheese: Full-fat block cream cheese gives the filling a firmer and creamier texture. Avoid using very soft spreadable cream cheese from a tub when possible.
Cocoa powder: Unsweetened cocoa adds extra chocolate flavor without introducing additional sugar.
Sour cream: It adds mild tanginess and helps balance the richness of the chocolate.
Heavy cream: Use cold heavy cream for the mousse so it can whip properly.
Godiva chocolate: If you have Godiva chocolate available, it fits the theme of this recipe. Otherwise, another good-quality dark chocolate can be used.
How to Make Godiva Chocolate Cheesecake
Prepare the Pan and Oven
Heat your oven to 350°F (175°C). Lightly grease a 9-inch springform pan and line the bottom with parchment paper.
A springform pan is particularly useful here because the finished cheesecake has several delicate layers and is easier to remove without turning it upside down.
Make the Chocolate Brownie Base
Melt the dark chocolate and butter together in a microwave-safe bowl using short heating intervals. Stir between each interval until completely smooth.
Let the mixture cool slightly, then whisk in the sugar. Add the eggs one at a time, mixing after each addition. Stir in vanilla, cocoa powder, and salt until you have a smooth chocolate batter.
Spread the batter evenly into the prepared pan.
Bake for about 12–15 minutes, just until the surface is set. The base does not need to be completely dry because it will bake again with the cheesecake layer.
Let it cool while you prepare the filling.
Melt the Chocolate for the Cheesecake
Place the chopped dark chocolate in a heatproof bowl and melt it gently. Stir frequently so the chocolate stays smooth.
Set it aside for a few minutes. It should remain fluid but should not be extremely hot when added to the cream cheese mixture.
Make the Cheesecake Filling
Beat the softened cream cheese and sugar until smooth. Avoid whipping excessively because too much incorporated air can contribute to cracks during baking.
Add the eggs one at a time, mixing just until each disappears into the batter.
Mix in the vanilla, sour cream, cocoa powder, and salt. Finally, add the slightly cooled melted chocolate and stir until the color is completely uniform.
Pour the filling over the cooled brownie base and smooth the surface.
Bake Until the Center Still Has a Slight Jiggle
Bake at 325°F (165°C) for approximately 50–65 minutes.
The edges should look set while the center should still have a gentle wobble when the pan is carefully moved.
Do not wait for the entire surface to become firm inside the oven. Cheesecake continues setting as it cools, and overbaking can produce a dry texture or cracks.
Turn the oven off and leave the cheesecake inside with the door slightly open for about an hour.
Then remove it and let it cool completely.
Chill the Cheesecake
Once the cheesecake reaches room temperature, cover it and refrigerate it for at least 6 hours, preferably overnight.
This step is important. A properly chilled cheesecake is easier to top, slice, and serve without the layers sliding apart.
Make the Chocolate Mousse
Melt the dark chocolate with the butter over low heat or using gentle microwave intervals.
Let it cool slightly before mixing in the egg yolks.
In a separate clean bowl, beat the egg whites until foamy. Add the cream of tartar and continue beating until firm peaks form.
Fold the whipped egg whites gently into the chocolate mixture. The goal is to keep as much air as possible.
In another bowl, whip the heavy cream with the sugar until it reaches a thick, soft-to-medium peak. Fold the whipped cream into the chocolate mixture along with the vanilla.
The finished mousse should be light enough to spread but thick enough to sit on the chilled cheesecake.
Assemble the Cheesecake
Keep the cheesecake inside the springform pan while adding the mousse.
Spread the chocolate mousse evenly over the cold cheesecake. Use an offset spatula to create a smooth top.
Refrigerate for another 2 hours, or until the mousse is firm enough to slice cleanly.
Carefully release the springform ring.
Finish each slice with a small amount of whipped cream and chocolate shavings.
How to Get Clean Cheesecake Slices
For those neat bakery-style slices, use a long sharp knife.
Dip the blade in hot water, wipe it dry, and make one clean cut. Repeat the process for each slice.
Do not use a sawing motion. A warm, clean blade gives the chocolate layers a much smoother edge.
Common Mistakes to Avoid
Using Cold Cream Cheese
Cold cream cheese can leave small lumps in the filling. Let it soften at room temperature before mixing.
Adding Hot Chocolate
Very hot melted chocolate can change the texture of the cheesecake batter. Let it cool slightly before combining it with the cream cheese mixture.
Overmixing the Eggs
Mix the eggs only until incorporated. Excessive mixing introduces unnecessary air into the batter.
Overbaking
A cheesecake should not look completely firm in the center when it comes out of the oven. A slight wobble is desirable.
Cutting Before Chilling
This dessert has multiple layers, so cutting it while warm makes clean slices much harder.
Deflating the Mousse
Fold the whipped egg whites and cream gently. Vigorous stirring removes the air that gives mousse its lighter texture.
How to Serve Godiva Cheesecake
Because this cheesecake is extremely rich, relatively small slices are usually enough.
Serve it cold with:
- Fresh whipped cream
- Dark chocolate curls
- Fresh raspberries
- Strawberries
- A light drizzle of chocolate sauce
- Coffee or espresso
The slight acidity of berries is especially useful because it contrasts with the richness of the chocolate.
Can You Make This Cheesecake Ahead?
Yes. In fact, making it ahead is one of the easiest ways to reduce stress.
Prepare the baked cheesecake the day before and refrigerate it overnight. Add the mousse after the cheesecake is thoroughly chilled, then refrigerate again until the topping is firm.
This also gives the chocolate and cream cheese flavors more time to settle.
How to Store It
Keep leftover cheesecake covered in the refrigerator.
For the best texture, enjoy it within about 4–5 days.
To freeze it, cut the cheesecake into individual portions and wrap them carefully. Place the wrapped pieces in a freezer-safe container and freeze for up to about 2 months.
Thaw overnight in the refrigerator rather than on the kitchen counter.
Is This an Official Cheesecake Factory Recipe?
No. This is a homemade copycat-style recipe inspired by the chocolate cheesecake served by The Cheesecake Factory. It is not an official recipe released by The Cheesecake Factory or Godiva.
The commercial Cheesecake Factory Bakery product is described as a GODIVA® cheesecake with milk-chocolate pieces, chocolate mousse, ganache, and chocolate whipped cream.
Godiva Chocolate Cheesecake Recipe vs. Regular Chocolate Cheesecake
The biggest difference is the layered presentation.
A basic chocolate cheesecake recipe cheesecake factory style may focus primarily on the baked cheesecake itself. This version adds a brownie-style chocolate base and a separate mousse layer, giving you different textures in one slice.
That combination is what makes this godiva chocolate cheesecake feel much more elaborate than a standard chocolate cheesecake.
Recipe Success Tips
For the smoothest result, remember these five things:
- Use room-temperature cream cheese and eggs.
- Melt chocolate gently and let it cool slightly.
- Mix the cheesecake batter only until smooth.
- Remove the cheesecake while the center still has a small wobble.
- Give the finished dessert plenty of refrigeration time.
The waiting is the hardest part, but it is also what turns the soft layers into a sliceable dessert.
Godiva Chocolate Cheesecake Recipe
Ingredients
Equipment
Method
- Prepare the pan: Heat oven to 350°F (175°C). Grease a 9-inch springform pan and line the bottom with parchment.
- Make the brownie base: Melt chocolate and butter together until smooth. Mix in sugar, eggs, vanilla, cocoa powder, and salt. Spread into the pan.
- Bake the base: Bake for 12–15 minutes, then let it cool while preparing the cheesecake.
- Make the filling: Melt the dark chocolate and let it cool slightly. Beat cream cheese and sugar until smooth, then add eggs one at a time. Mix in vanilla, cocoa, sour cream, salt, and melted chocolate.
- Bake the cheesecake: Pour the filling over the cooled base. Reduce oven temperature to 325°F (165°C) and bake for 50–65 minutes, until the edges are set and the center gently wobbles.
- Cool slowly: Turn off the oven, leave the door slightly open, and let the cheesecake cool inside for about 1 hour. Cool completely before refrigerating.
- Chill: Cover and refrigerate the cheesecake for at least 6 hours, preferably overnight.
- Prepare the mousse: Melt chocolate and butter. Cool slightly and whisk in egg yolks. Separately whip egg whites with cream of tartar until firm peaks form.
- Finish the mousse: Whip heavy cream with sugar until thick. Gently fold the egg whites and whipped cream into the chocolate mixture, then add vanilla.
- Add the mousse: Spread the mousse over the chilled cheesecake while it remains in the springform pan. Refrigerate for another 2 hours.
- Serve: Remove the pan ring and decorate slices with whipped cream and chocolate shavings. Use a warm, clean knife for neat slices.
Notes
- Full-fat block cream cheese gives the best texture.
- Do not overbake the cheesecake; the center should retain a slight wobble.
- Let melted chocolate cool slightly before adding it to the filling.
- Overnight chilling gives the cleanest slices.
- This is a homemade copycat-style recipe, not an official Godiva or Cheesecake Factory recipe.
Frequently Asked Questions
How to make Cheesecake Factory Godiva chocolate cheesecake?
Make a chocolate brownie base, add a dark chocolate cheesecake layer, bake until gently set, chill thoroughly, then finish it with homemade chocolate mousse.
What makes Godiva cheesecake unique?
Its appeal comes from combining intense chocolate flavor with contrasting textures from the baked cheesecake, chocolate base, and mousse topping.
What are the ingredients in Godiva chocolate cheesecake?
The main ingredients are dark chocolate, cream cheese, eggs, sugar, cocoa powder, sour cream, butter, heavy cream, and vanilla.
What is the best chocolate cheesecake recipe?
A good chocolate cheesecake should have a smooth filling, concentrated chocolate flavor, a balanced crust, and enough chilling time to achieve a clean texture.
Is this an easy Godiva chocolate cheesecake recipe?
It is more involved than a basic cheesecake because it has three components, but each component uses straightforward baking techniques.
Can I make Godiva cheesecake without Godiva chocolate?
Yes. A quality dark chocolate can be substituted if Godiva chocolate is unavailable.
How long should Godiva cheesecake chill?
Chill the baked cheesecake for at least 6 hours, then chill the mousse-topped cheesecake for another couple of hours before serving.
Is Godiva chocolate cheesecake gluten free?
Do not automatically consider it gluten free. The ingredients and chocolate base need to be checked carefully, especially if using packaged chocolate or cookies. The Cheesecake Factory Bakery product lists wheat among its allergens.
How many calories are in Cheesecake Factory Godiva chocolate cheesecake?
Calories depend on the specific product and serving size. The commercial product and this homemade version should not be assumed to have identical nutrition.
What are Cheesecake Factory Godiva chocolate cheesecake ingredients?
The commercial bakery product includes cream, cream cheese, Godiva semi-sweet and milk chocolate, chocolate cookie crumb, sugar, eggs, chocolate fudge, sour cream, and other ingredients.
How much is Cheesecake Factory Godiva chocolate cheesecake?
Restaurant pricing can vary by location and can change over time, so check the current menu for the specific restaurant before ordering.
Final Thoughts
This godiva chocolate cheesecake recipe is made for serious chocolate lovers. The brownie-style base gives each slice a fudgy foundation, the baked cheesecake provides the rich creamy center, and the mousse creates a soft finish that makes the dessert feel special.
It does take more time than an everyday cheesecake, but most of that time is baking, cooling, and chilling rather than complicated hands-on work. If you prepare it a day ahead, it becomes an excellent dessert for birthdays, holidays, dinner parties, or any occasion where you want a dramatic chocolate centerpiece.
2 thoughts on “Godiva Chocolate Cheesecake Recipe: Rich, Creamy & Decadent”